I often get asked where a good place would be to tap into a boost/vacuum source. Typically it’s for a gauge, but sometimes other reasons such as an aftermarket blow-off valve (BOV). Well, even though there are more ways to skin this cat, I’d say this is probably the best (and possible easiest) place to tap into a boost/vacuum source. All that being said, I have to tell you all. There is a better way to read boost/vacuum and that is directly through the PCM digitally. It’s a bit more involved but the end product is a much nicer setup with more capability. Check out this write-up to find out more.
So, we all know that the intake manifold (after the throttle body) in a boosted application is the place that sees both boost and vacuum, so that’s really the source of what we’re after. But it isn’t always easy to get to that source directly from the manifold. The next best thing is to tap into a line coming directly off the the manifold and this is what is happening here.
The line coming off the manifold we are after is the brake booster line. It comes off a port right after the throttle body and it is the one with the white push-2-release connector (the yellow one goes to the EVAP line, so we’ll leave that one alone). This line is secured to the strut tower bar and connects to the top of the intake tube and also goes to the brake booster.
This is the line we will be cutting into. If you want to buy a new one there are a few part number variations depending on which transverse 3.5L EcoBoost you have. The one pictured is PN: DG1Z-9C490-B. I have a 2015 Explorer Sport, but this one went to a 2013-2014 Explorer Sport. I bought the wrong one, but made it work. The only difference was the preformed curved nylon hose section (Ford calls it the “service tube”) that is going onto the throttle body was formed into a slightly different curve, but it still worked. The correct one I should’ve gotten is PN: FB5Z-9C490-B, but I made the other one work…no harm, no foul. There a few iterations of this part that fit different models, only difference between them is that “service tube” shape with very minor differences.
- DG1Z-9C490-B
- FB5Z-9C490-B
- GB5Z-9C490-A
The white connector hose is what we are after.
Yellow connector is for the EVAP stuff, let’s leave that one alone.
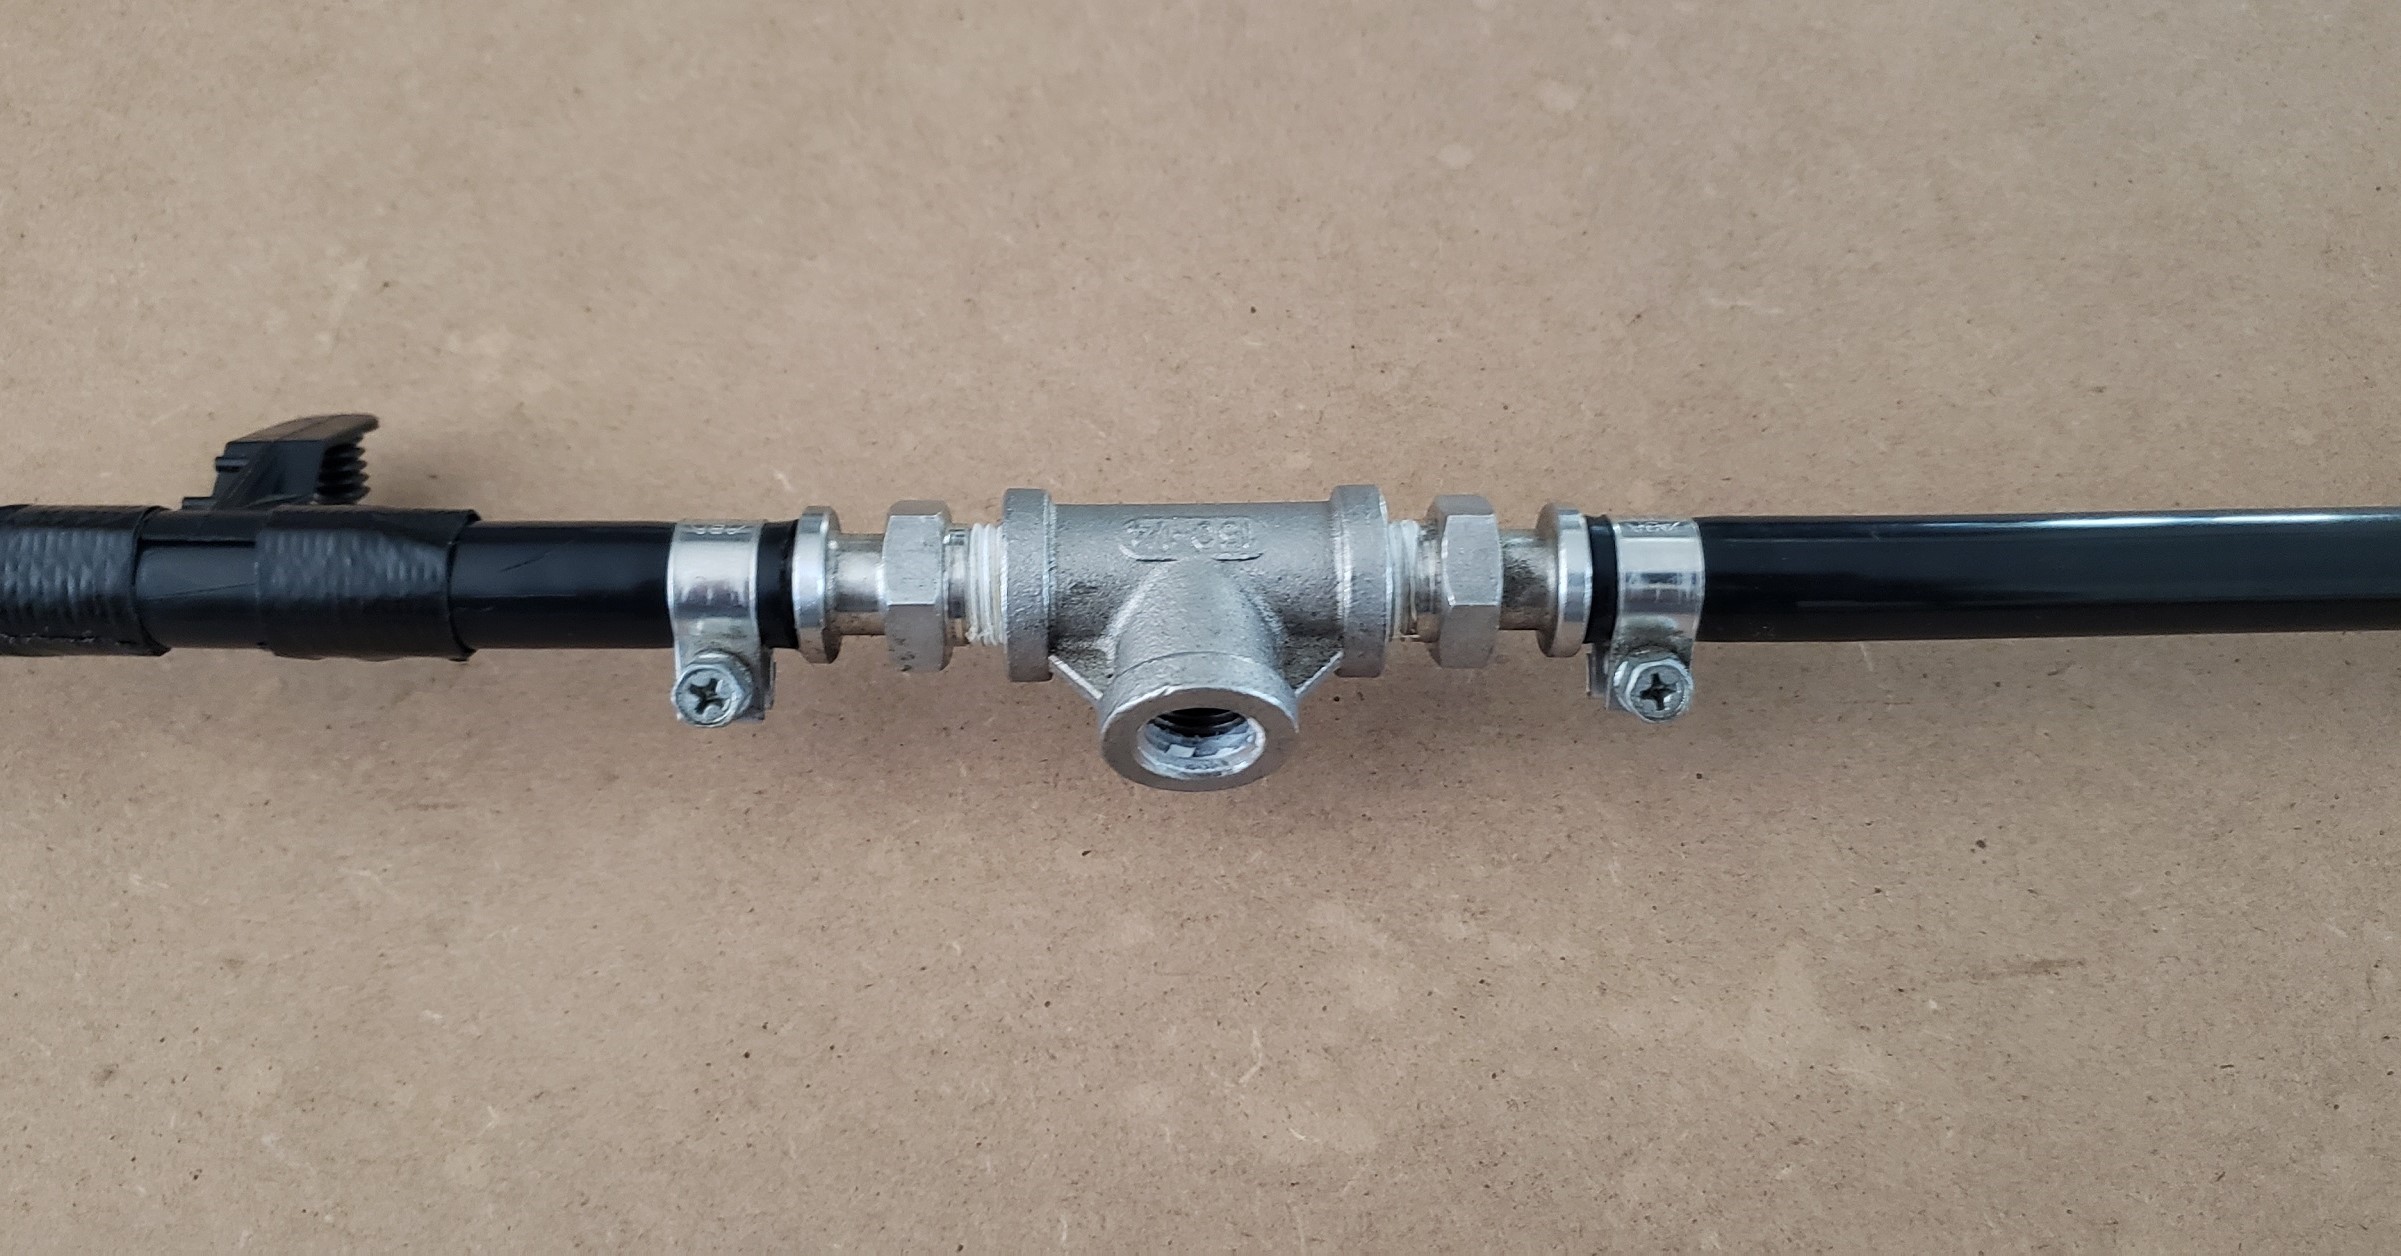
So when we tap into this line, there are a number of ways to do this. The parts list below is, in my opinion, the best setup as it has some provisions for securing it back to the strut tower bar as well as being stainless to help keep it in good shape for the life of the vehicle. Obviously, if you are looking for a more budget minded option some of these parts can be substituted. Ordered everything from my favorite hardware website McMaster-Carr.
- 304 Stainless Steel Low-Pressure Tee Connector, Qty: 1
- 304 Stainless Steel Steam Barbed Hose Fitting, Qty: 2
- 304 Stainless Steel Tight-Seal Bolt Clamp, Qty: 2 (from 1 pack of 5)
The output from the tee fitting can be an adapter of your choice. When I was running this arrangement for my BOV, I used a push-to connect (P2C) fitting, but a standard barb or AN fitting can be used, depending on how you want to terminate the connection.
Once assembled, it will look like this (pictured is the P2C fitting I used with it). Ensure you measure the distance between the red lines and remove that amount from the nylon hose you will be splicing it into. This will ensure it is the exact same overall length.
Here is the assembled unit with the appropriate amount of hose removed and the hose clamps secured.
Installed into the vehicle. As you can see, the 2 “grooves” on each of the barb fittings make excellent hold down locations for zip ties. You can re-use the factory push-in clips or zip ties on the edges, like I did.
Just a close up of the setup.
Here you see the push-in hose (semi-clear) that runs to the BOV.
A close-up of the curvature of the “service tube”.
And just to get an idea of where I ran the line and how it looks, here is the BOV. But if you wanted to use that source for a gauge, you can run it into the cab along a different route.
Next few images are just close-ups of the installation.
When I eventually purchased a new intake manifold, I switched my boost/vacuum source. I reinstalled the factory, uncut brake booster hose and then moved it to directly behind the throttle body. It is tapped with a 1/4 NPT in two places, in case i ever needed another boost/vacuum source.
Parts used in this photo”
- Push-to-Connect Tube Fitting for Air 90 Degree Swivel Elbow, for 8 mm Tube OD x 1/4 NPT Male, PN: 5225K725
- 316 Stainless Steel Threaded Pipe Fitting Low-Pressure, Plug with External Square Drive, 1/4 NPT, PN: 4452K122
I eventually changed out from the plastic P2P fitting of the BOV also to an all stainless version. And I also up-sized it to a 10mm hose.
This went for the fittings on the intake manifold as well. I changed the pipe plug to a 1/4 BSPP Low-Pressure 316 Stainless Steel Threaded Plug. PN: 3600N21. As for the plastic P2P fitting, that was changed out to an all stainless version as well.
Here is the engine all tidied up. Now I don’t use the boost/vacuum source from the brake booster line, but instead from right behind the throttle body.