This is a mod that @Nova of the SHO Forums inspired me to do. Not really anything that helps performance, but spruces up the interior a bit, IMHO. Guess I was tired of looking at the same one, so I was ready for a change and it was good to see someone lead the way on that, so thank you!
Anyway, it wasn’t as plug & play as it seems to be in the SHO, but it still wasn’t too difficult.
So, there were 2 parts needed for purchase; the shifter arm, and the knob. The arm had to be pretty specific to the vehicle but the knob could be anything of your choice that fit the threaded portion of the shift arm.
The shift arm used was one from an automatic 2015-2020 S550 Mustang, and it fit perfect. Place I got mine from was WMG. You’ll notice I went with the short shifter version as I initially thought it would look a bit more “trick” being shorter…but ultimately, I’m glad I went with that option because in the Explorer application, the “short” one ended up being as high as the OEM one…so the standard shifter would’ve ended up taller and would just look funny. So get the short shifter, at least for the Explorer.
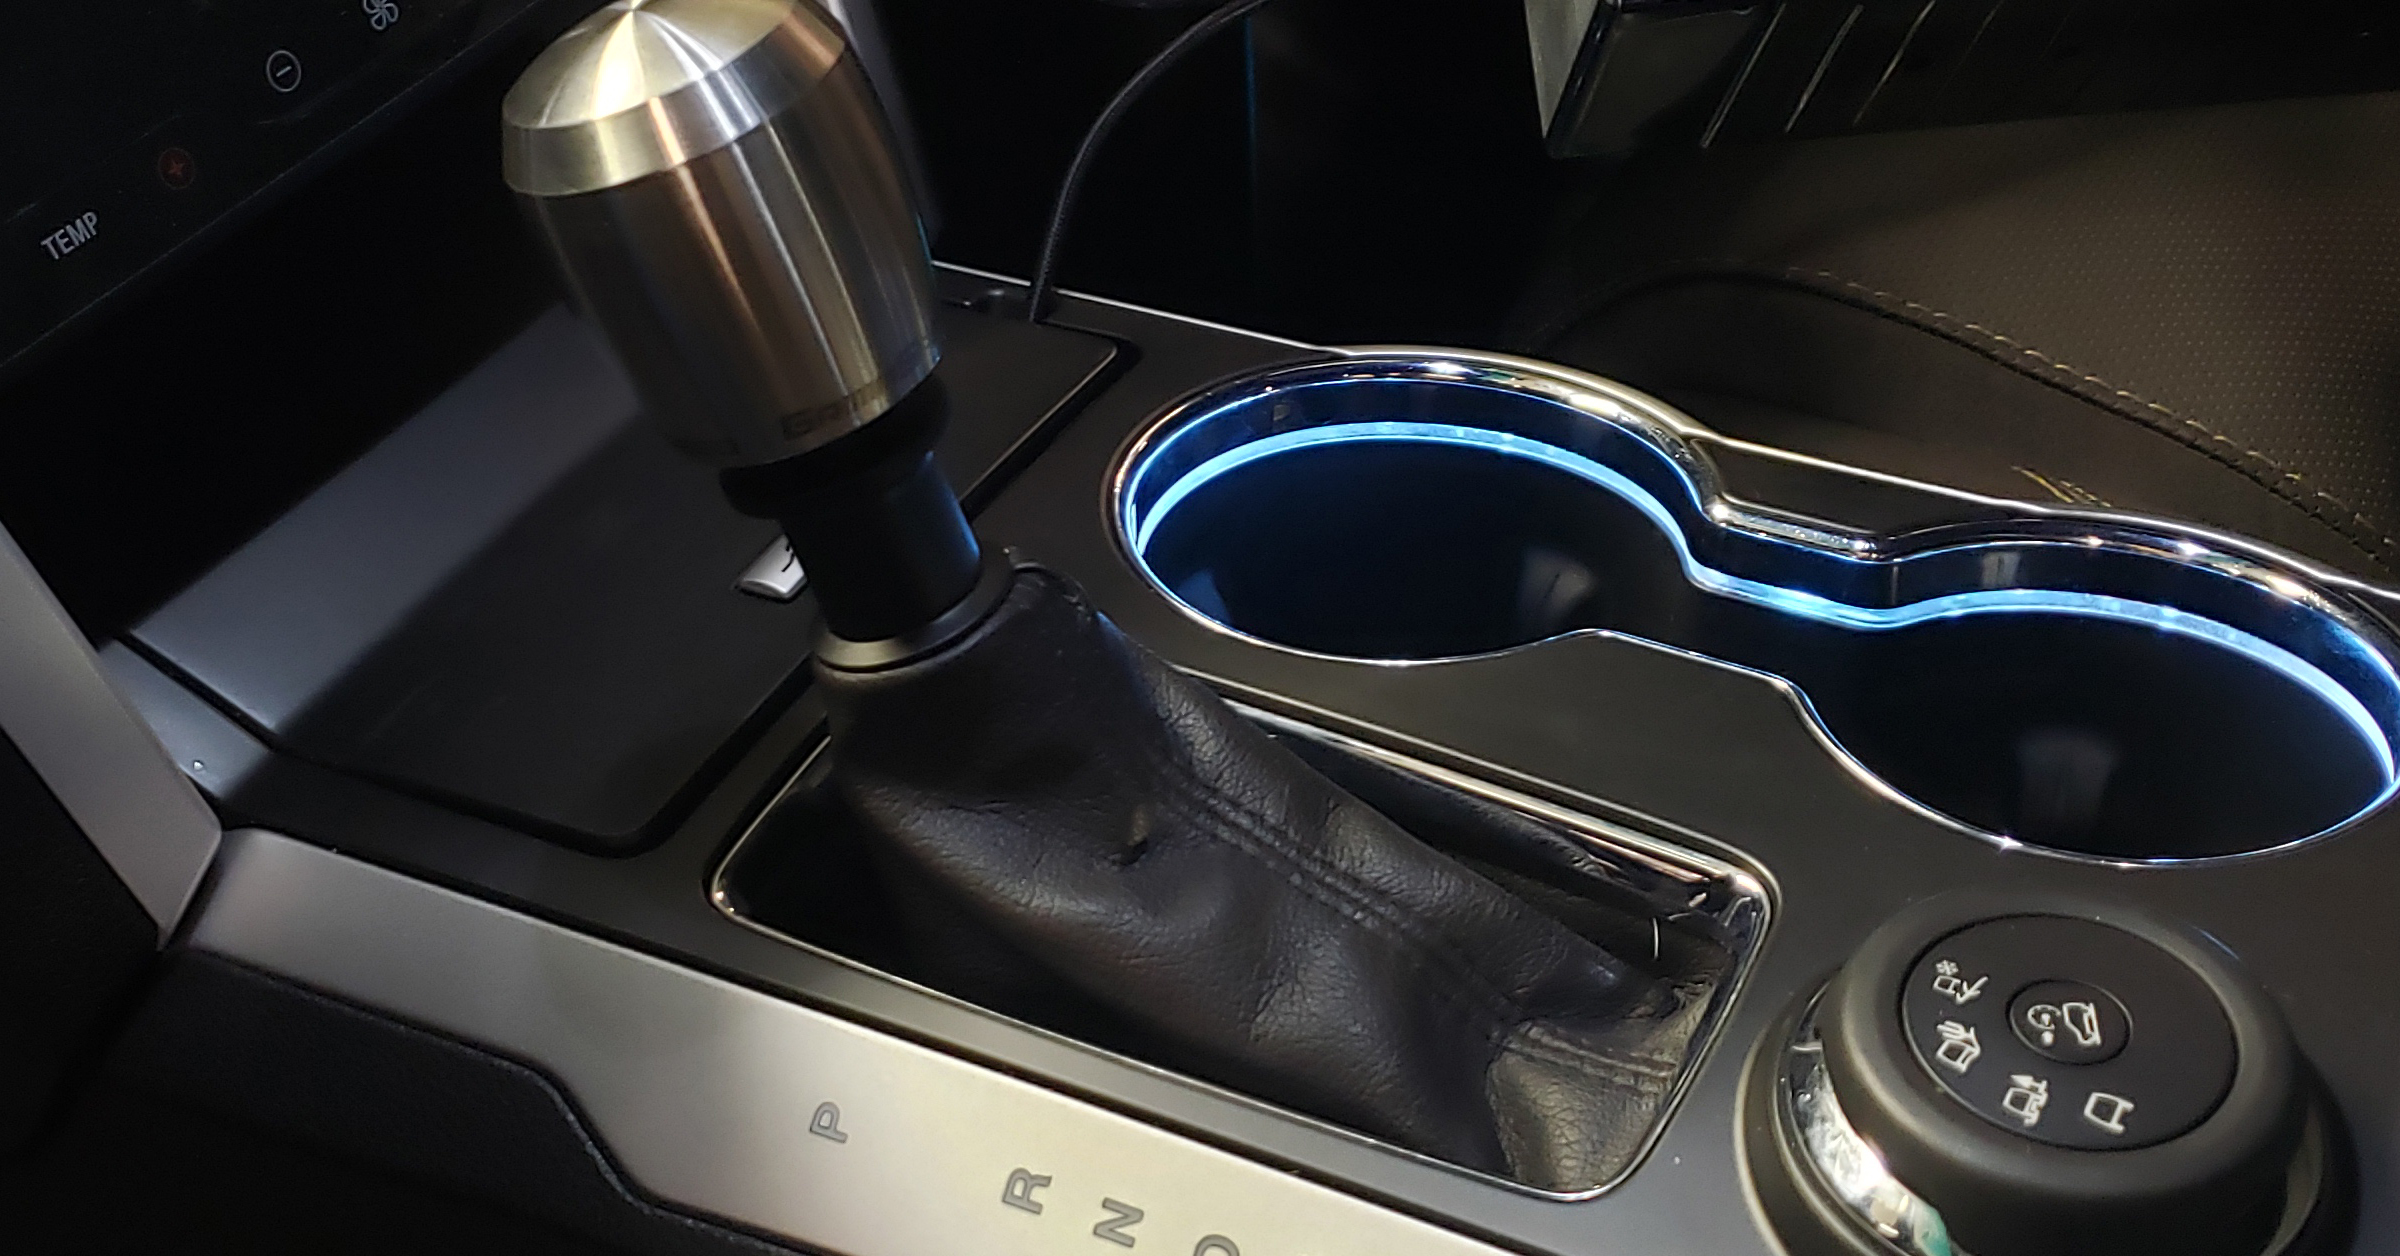
As for the knob, I opted for something a bit classy and understated. I liked the simple appearance of the stainless version of the stubby Grimmspeed knob. And it’s HEAVY, which is nice…feels solid in your hand.
It even comes with its very own “Crown Royal Bag” when you get it (I forgot to take a pic of it, but it’s basically a tiny version of the famous velvet bag…a coin purse, if you will), LOL!
As for installation, following this video from WMG helped:
Along with this video for how to tear down the center console:
So, to cover more of the removal/install…although I did this step a bit farther in, you can probably do this right at the beginning. Pop off the OEM shift knob, just pry in between the crevice…don’t be shy, it will pop off:
It’ll look like this:
I didn’t completely remove the console; I just disconnected the terrain management switch and the gear indicator LED panel. Then you can lift it up and out of the way, exposing the actual shift lever:
At this point, go ahead and remove the leather boot retaining collar from underneath. It’s glued on so you’ll have to just peel it off:
Now, remove the white plastic pushrod, taking note of the orientation:
Instructions for the kit say to cut an inch off the lever assembly.
Final look after filing the burrs off and sanding it smooth. Then used the alcohol to clean everything.
The kit comes with 2 extra pushrods, so that you wouldn’t have to cut the one it comes with. Unfortunately, when you place the existing pushrod next to it, you can see, it’s just too short. So, the S550 Mustang has a different length shift lever. So that means I had to modify the existing one. Too late, so I had to go for it anyway, LOL.
So, I made some marks denoting the stroke of the existing setup along with what would be the new setup. Red marks show the resting position of the rod when inserted inside the lever as well as the depressed position. The black marks show the same “stroke” with the lever cut down an inch. Orange mark is exactly 1” from the tip. That is where I cut.
NOTE: I had to cut it a tiny bit shorter, about 1/16″. When I had assembled it, it would move freely across the shifted gears, and even go into the PARK position, but wouldn’t show it was actually in park. Turns out the pushrod was just a touch too long and wouldn’t let the micro-switch make contact letting the car know it was actually in park.
Well, with it cut and after inserting it back into the newly trimmed lever (oriented properly, of course), it’s time to install the adapter. Start by placing it onto the shaft loosely, then work the shift boot over it and place the zip on the underside. Zip it tight, trim the zip tie, then slide it as high up as it will go.
Tighten the back screw using the provided countersink head screw:
Then onto the front one:
After you’ve done all this, you can begin re-installation of the console. Remember to reinstall the gear indicator light bar and the connector for the terrain management switch. Actuate the shifter throughout the range with the car on to ensure it behaves properly, paying close attention to when it is in PARK. Does the “P” on the gauge cluster light? If not, you may have to trim very, very slightly the pushrod.
If all is well, then install the knob of your choice onto the threaded portion and enjoy!
A few things to note. I really like shifting it this way, by pushing own on the entire knob. But I think what makes it so smooth is the weight of the shift knob. It’s very heavy so it makes engagement feel very positive. I can’t speak to a light one, but I gotta say I like this setup.
Also, I was initially hoping for a shorter shift lever on the console when finished, but after discovering the subtle nuance between the length of the shifter in the Explorer versus the one in the Mustang, I’m glad I went with the short one…as it ended up being the same overall height as the stock lever. Had I gotten the standard height one, it would’ve been too tall.