OK, this was a project that came about last minute and spur of the moment. I frequently datalog with my SCT device and use the laptop to accomplish this. Typically, I’d just put it in the passenger seat and do what I need to from that angle. However, it always bothered me as I would have to turn my head very far away from the road as I start and stop the logging and it was typically very awkward. This wasn’t really too big of a deal and I normally just dealt with it.
Well, fast forward to one of my datalogging attempts where I was also testing out my Dragy device and doing a 60-0 braking test. That didn’t go over too well because as soon as I hit the brakes, I wasn’t prepared for the laptop to fly forwards into the floorboard at full speed. Well, it pretty much destroyed the laptop, cracking the screen, keys broken off and my data cord ripped out to the wire. Needless to say, I was pretty upset.
Luckily I was in the process of moving everything over to a new laptop anyway as that broken laptop was my old one. So, not wanting to break my new laptop, I decided to take advantage of the fact that the Ford Explorer is also used as a police vehicle, with many options to mount police communications gear available on the market, to include laptop mounts.
So after doing some research, I decided to go with the RAM Mount. It’s inexpensive, well made, has a good reputation and also made in the USA…
You’ll expose the front mounting bolts. And it’s easier to make room if you remove the T-20 Torx screws, but it isn’t necessary:
…you will need to loosen the 13mm front seat bolts. You won’t need to take them out, but will need to back them out pretty much the entire way, right before they come out. Once they are loose, you can slide the base bracket between the floor pan and the seat mounting bracket. The outside one is easy, but the one closest to the center console may need to be pried up and hammered in with a soft hammer or dead-blow.
This is how I will drive 95% of the time as it allows full range of motion for the passenger seat, full access to the glove box and generally not in the way of anything.
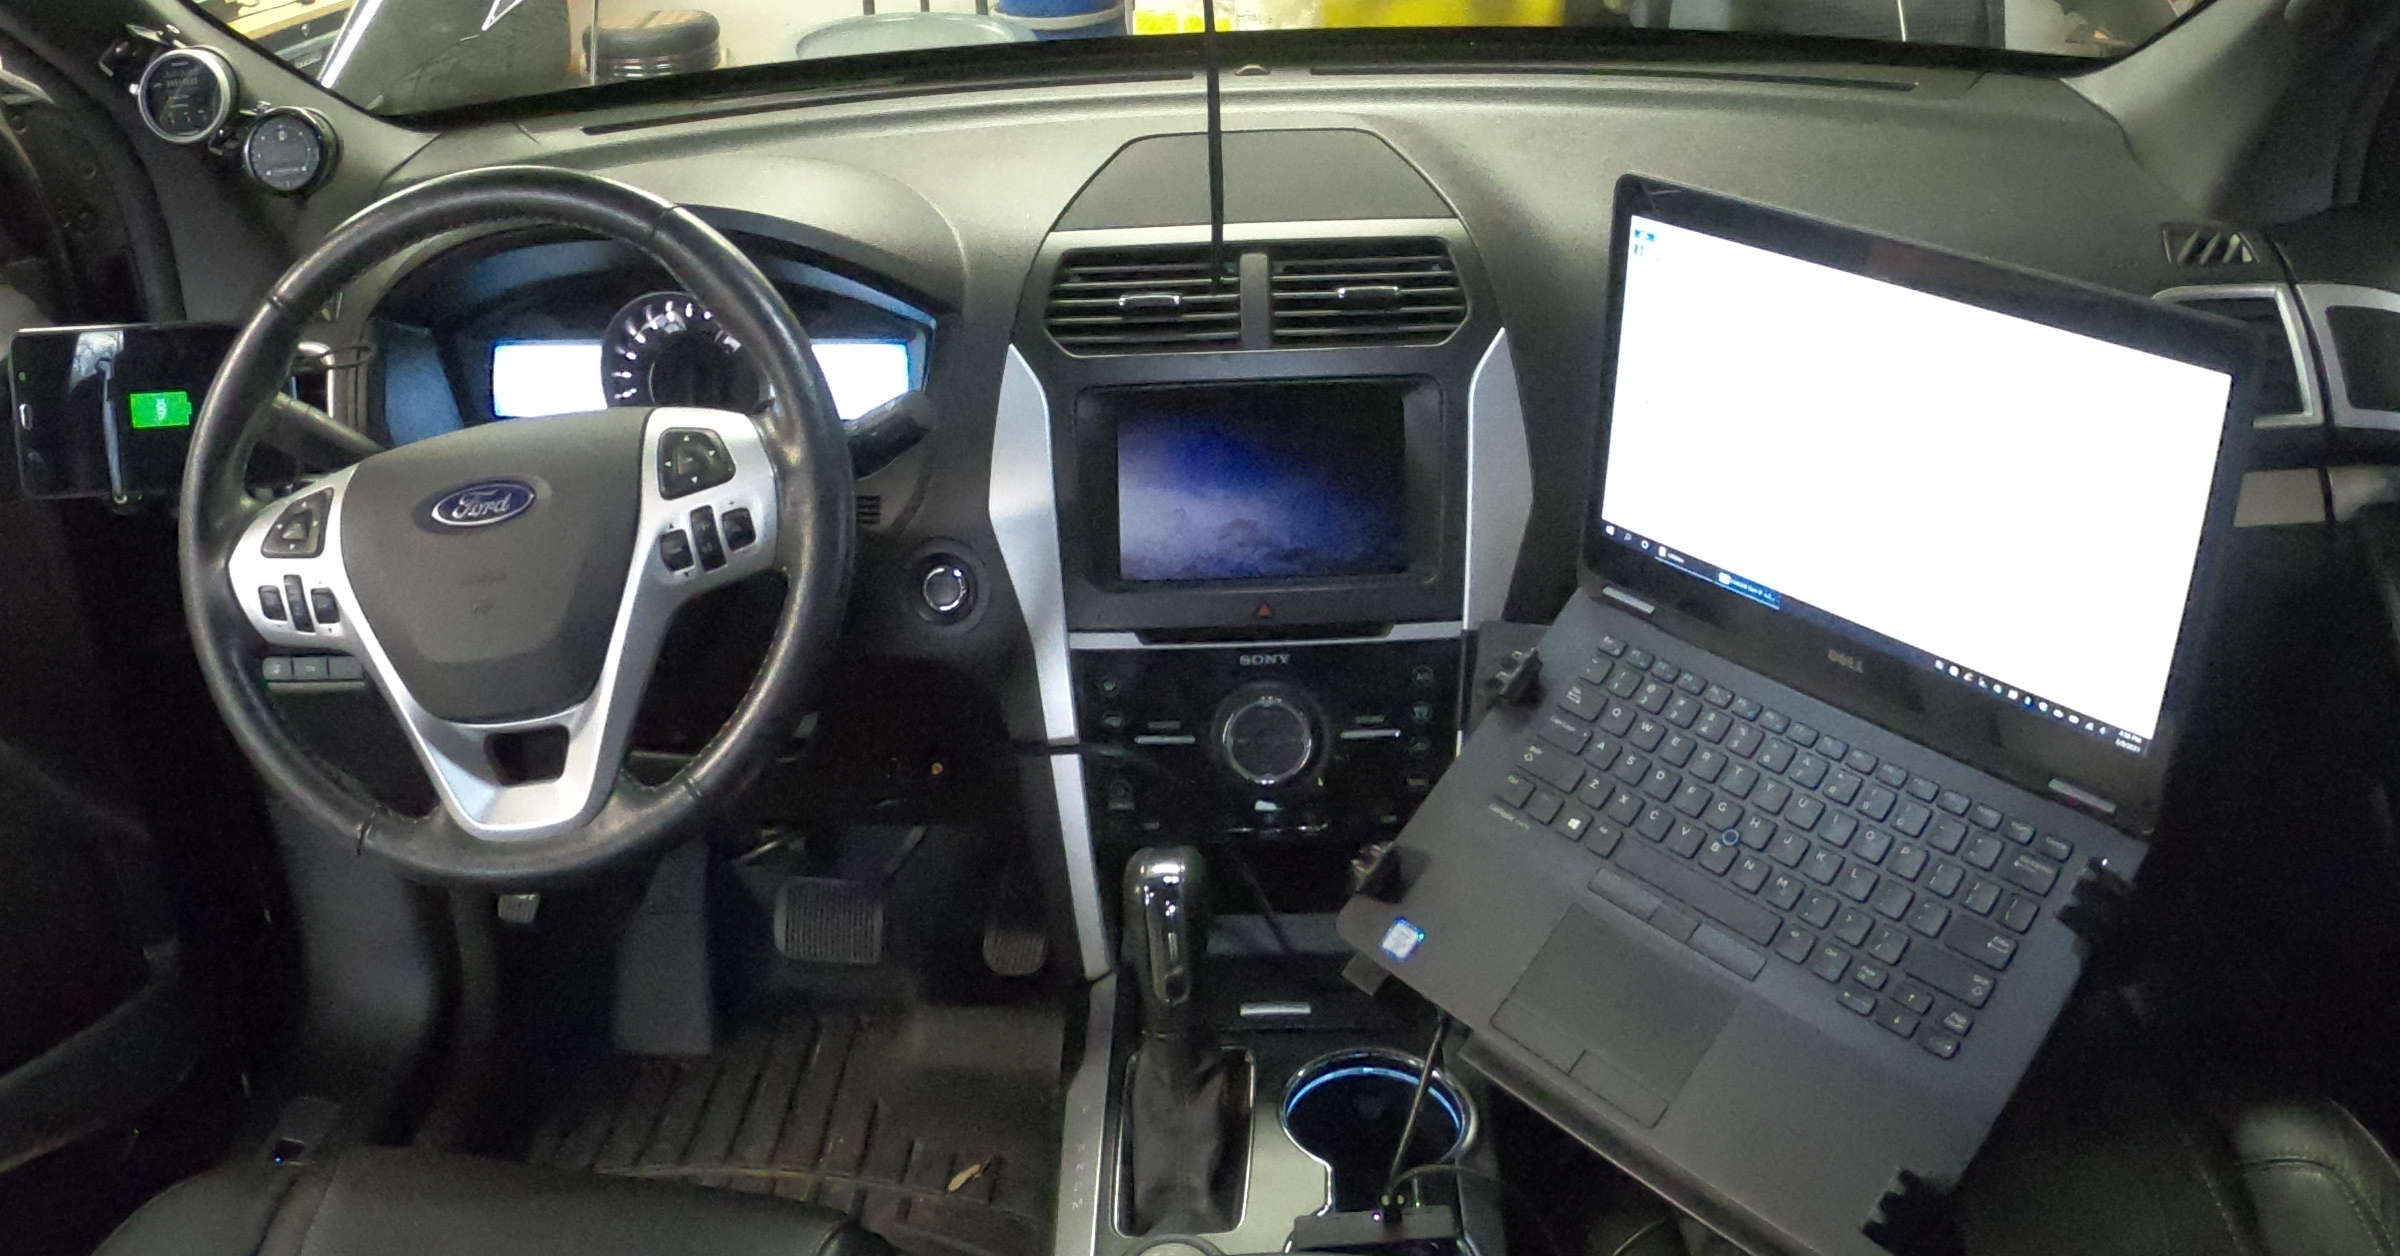
After assembling the remainder of the components, here is the mount installed as intended:
And finally, I love the easier access and control of the laptop:
As mentioned, I won’t typically drive with it, but when I do, it’s very surprisingly sturdy with large tightening knobs and heavy steel brackets:
It does shake/rattle a bit while driving down the road after hitting bumps. Not much but it would likely get on my nerves if I was driving with it full time. Luckily, I’m not. If I were looking for a full time laptop mount, there are more expensive options such as the Havis Standard or Havis Premium mounts as well as an option from Gamber-Johnson. I’m sure there are a few more.
One of the things I like about the RAM mount is that it doesn’t interfere with removal of the WeatherTech floor mats.
And here is the what the entire setup looks like outside of the vehicle:
It comes in at only about 12.5lbs, so not too bad, since I am concerned about weight.
Anyway, one of those mods that make life a bit easier, but not 100% necessary.