Installed both the XtremeDI XDI-60 high pressure fuel pump and the Innovate Motorsports ethanol content meter at the same time. The goal is maximum e85 capability, so it’s good to know what exactly is going in the tank and this meter will facilitate that.
Some of the other parts I bought to facilitate this:
- New injection pump roller tappet, Ford PN: AA5Z-9C587-A
- Raceflux -6AN Custom Hose Assembly (Length = 18″, Fitting 1 = 120deg, Fitting 2 = 90deg)
- ACDelco 13577429 GM Original Equipment Flex Fuel Sensor
- E85 Flex Fuel Sensor Connector Pigtail
- -6AN Male to 3/8″ Female Fitting
Started with the easy part. Installed the gauge on the a-pillar. It’s the lower one, the higher one is the Aquamist methanol flow meter gauge (later write-up on that).
So wiring it up was kind of a pain in the ass, mostly because it was difficult to find a place to go through the firewall for the sensor wire to come through. Here is a link to the install guide:
https://www.innovatemotorsports.com/support/manual/MTXD_Ethanol.pdf
As for wiring the actual gauge, I found a 12VDC switched power in the fuse box beneath the steering wheel, a ground wire to the chassis somewhere and then tapped into the headlight fuse in order to get illumination/dimming. I left the input connector outside in case I ever need to connect a laptop to it for programming.
After completing the gauge installation, I paused on the remainder of the flex fuel sensor to proceed with the XDI pump. Here is a video made by XDI that I found useful. It’s for a Taurus SHO, but installation is identical:
I’ll try not to rehash everything in the video and just cover some of the things worth pointing out.
Removal was relatively simple, but just make sure as you loosen the 2 torx bolts holding down, you alternate between the two so the pump comes up straight. Underneath is the roller tappet. Pull that out and replace it with the new one.
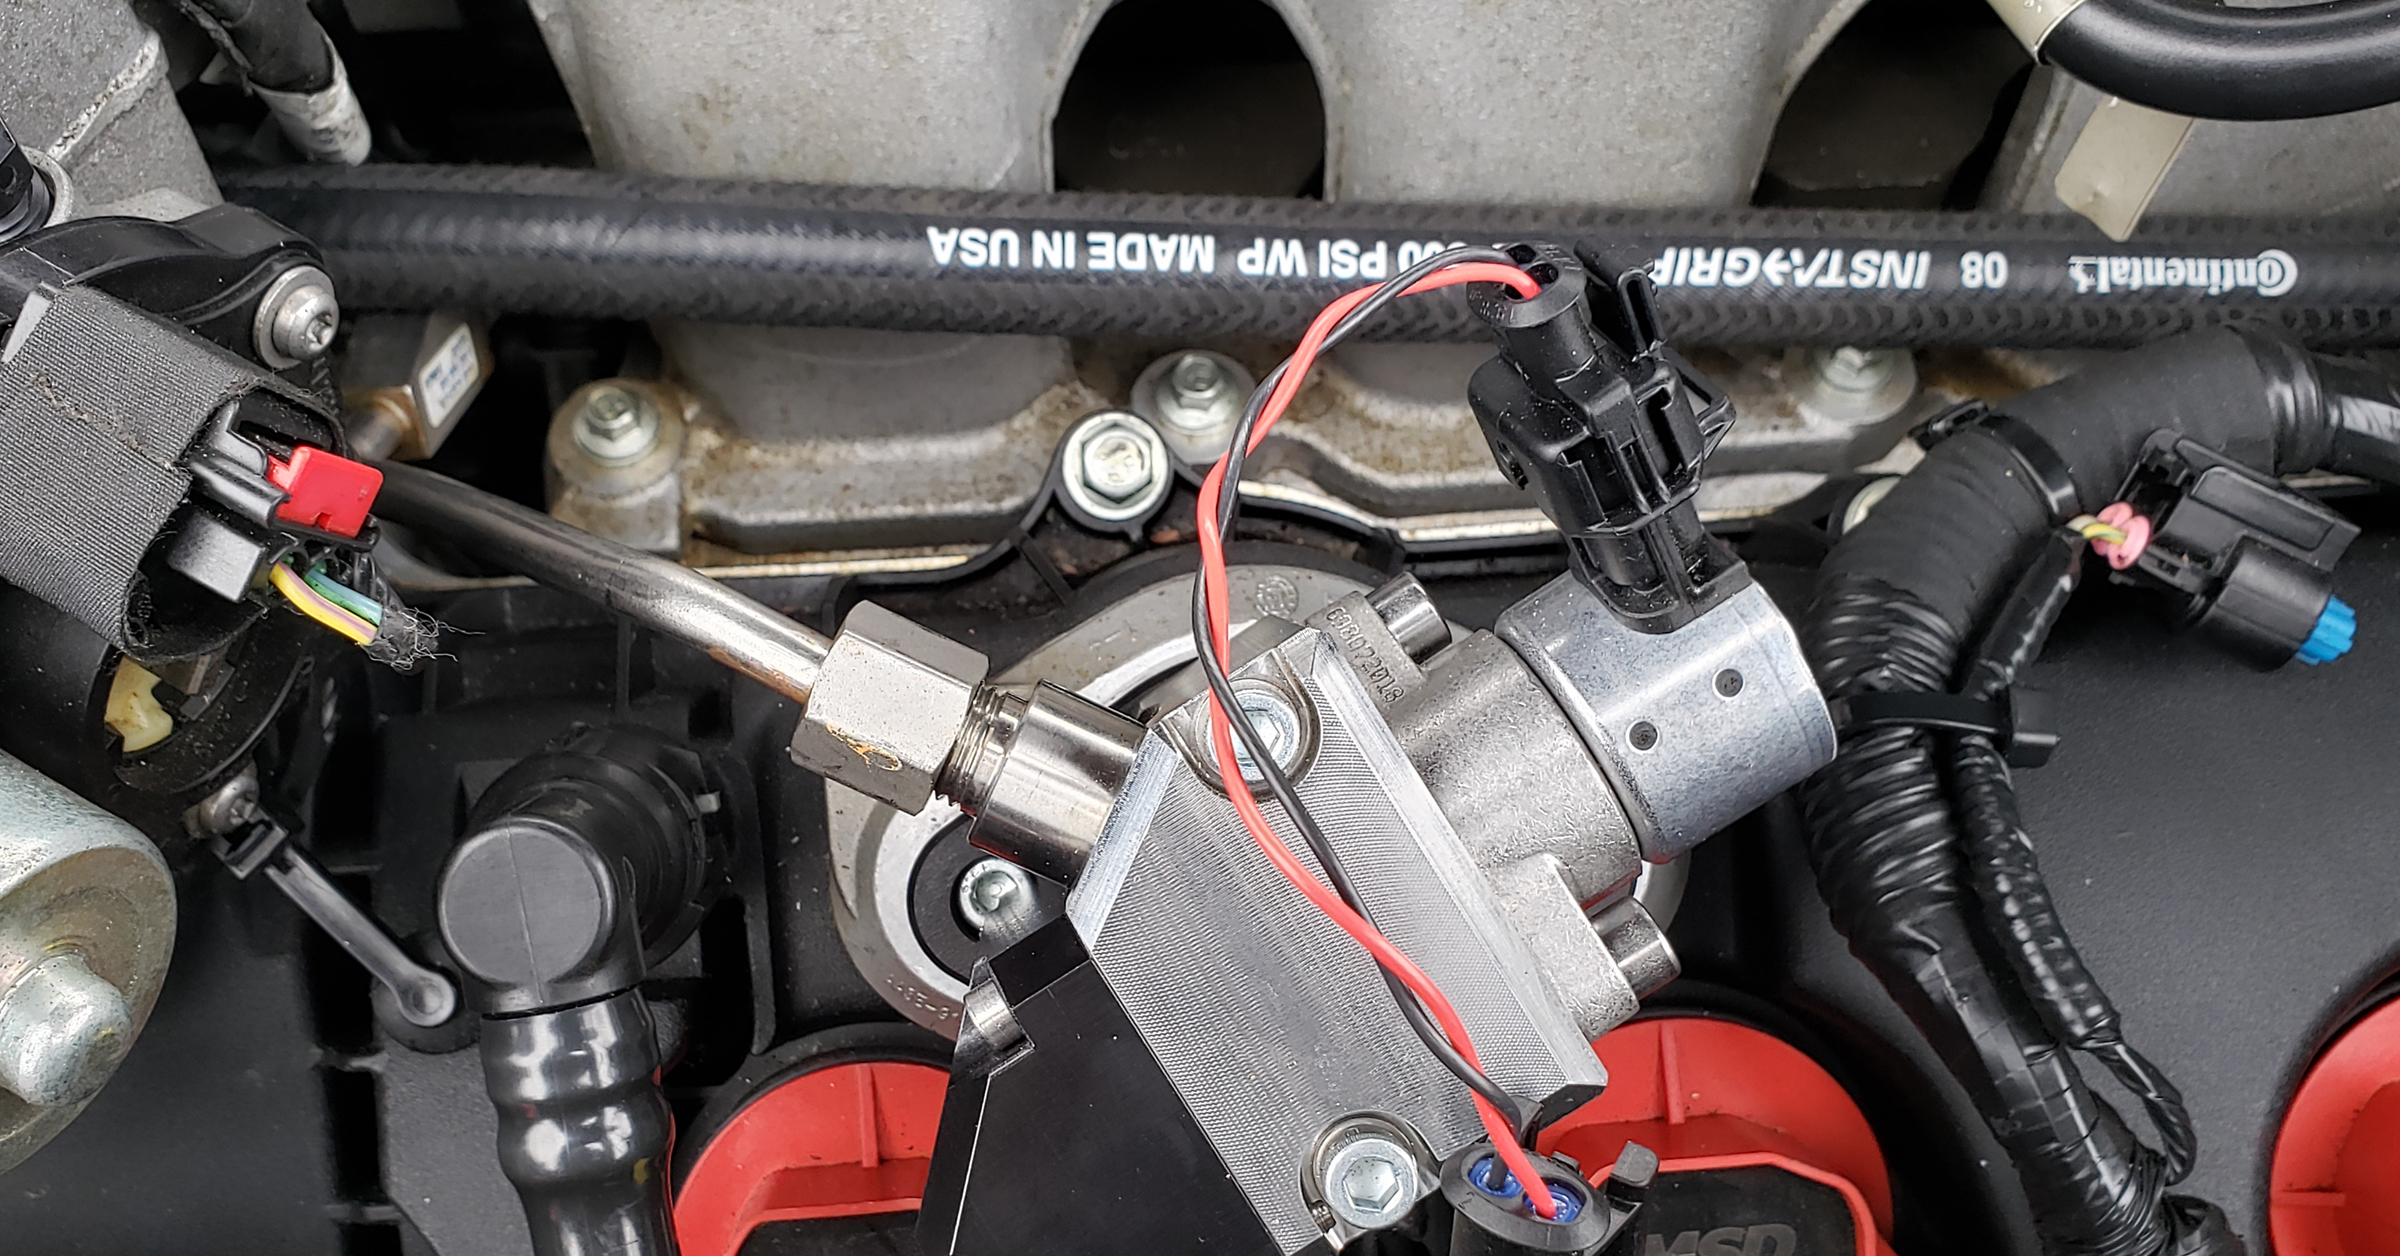
As you can see, there is some work to do to get that line connected properly. In the XDI video, you see that the nut holding the line down to one of the valve cover bolt/studs needs to be removed. Well, that stud was still getting in the way, so I removed it and cut off the stud portion of that bolt as it wasn’t needed anymore anyway. It gave me a bit more room to maneuver.
Make no mistake, this was the most pain-in-the-ass part of the installation. Getting that thing to seat then seal properly was a nightmare and at first I thought I got the wrong part. I had to contact XDI a few times via text with photos back and forth a few times to get approval from Uwe that all was well. He is the MAN, btw!
FUN FACT: According to service manual, this high pressure line is actually a one-time use part. Once it is disconnected, you are technically supposed to replace the whole line. If you don’t want to remove the entire intake manifold and all the shenanigans that comes with, than you will make this work, LOL. Keep in mind, that ball end is supposed to “seal” into the pump in a sort-of “crush” fitting way. This is why it is one-time only. It is difficult to get that seal again once it is broken.
It leaked the first few times I tried it, but after yelling at it a few times, it finally listened to me and sealed up.
Now back to the sensor so I can get the low pressure fuel line installed. I connected the sensor onto the fuel line that comes up from the back of the firewall on the passenger side as well as the -6AN Male to 3/8″ Female fitting.
As you can see in the lower part of that photo, the low pressure fuel hose that came with the XDI pump (has the yellow cap on it) was a bit short, so I had to order the RaceFlux one.
Once that was connected…
…the pump was all done and it was at this point I did the test run for fuel pump leaks (I had some as stated earlier). Worked through that issue and finally got it sealed, as mentioned. Now to get the flex fuel sensor wire through the firewall somehow. In order to do that, I had to remove the wiper arms, hood cowl and wiper motor assembly. Link for that write-up is here.
You can see in the photo below how I ran the wire in the engine bay after connecting it to the sensor. Punched the wire through the cowl area using a rubber grommet here.
I made a small slice in this rubber cover and pushed it through here to get into the cabin area.
I then used some RTV to seal it back up. But even through this opening it is still a pain to fish it through. For this job, I used a tool I learned to use back in my stereo install days.
It’s the perfect tool to feed wires through openings as you just tape it to one end with electrical tape and when it comes out the end you need, just pull it through, undo the tape and you’ve got your wire fished.
Once it was through here and down into the cabin, I wired it up to the gauge end and tidy’d up the install and put everything back together. Once it’s up and running, you can see the ethanol content of whatever fuel you are running, even mixtures, as well as the temperature of the fuel. Now this isn’t much other than a tattle-tell gauge but the great thing is, there is a 0-5VDC output signal for both the ethanol content as well as fuel temp the gauge can send if you had some sort of stand-alone fuel system or found a way to integrate this into a true flex fuel system.
I am tuned for 100 octane at the moment, so the fuel has anywhere between 6.5% to 7.0% ethanol in it. 91 to 93 octane typically has about 10% or so.
And a final video with engine running.