Here’s something pretty cool. When I add accessories to any of my vehicle builds, I like to have everything powered from a central hub of some sort. This minimizes having a bunch of wires connected to the battery and fuses holders in all sorts of different locations. The issue is, I wanted to put most of the smaller accessories inside the glove box and would need something small enough to fit.
Introduction
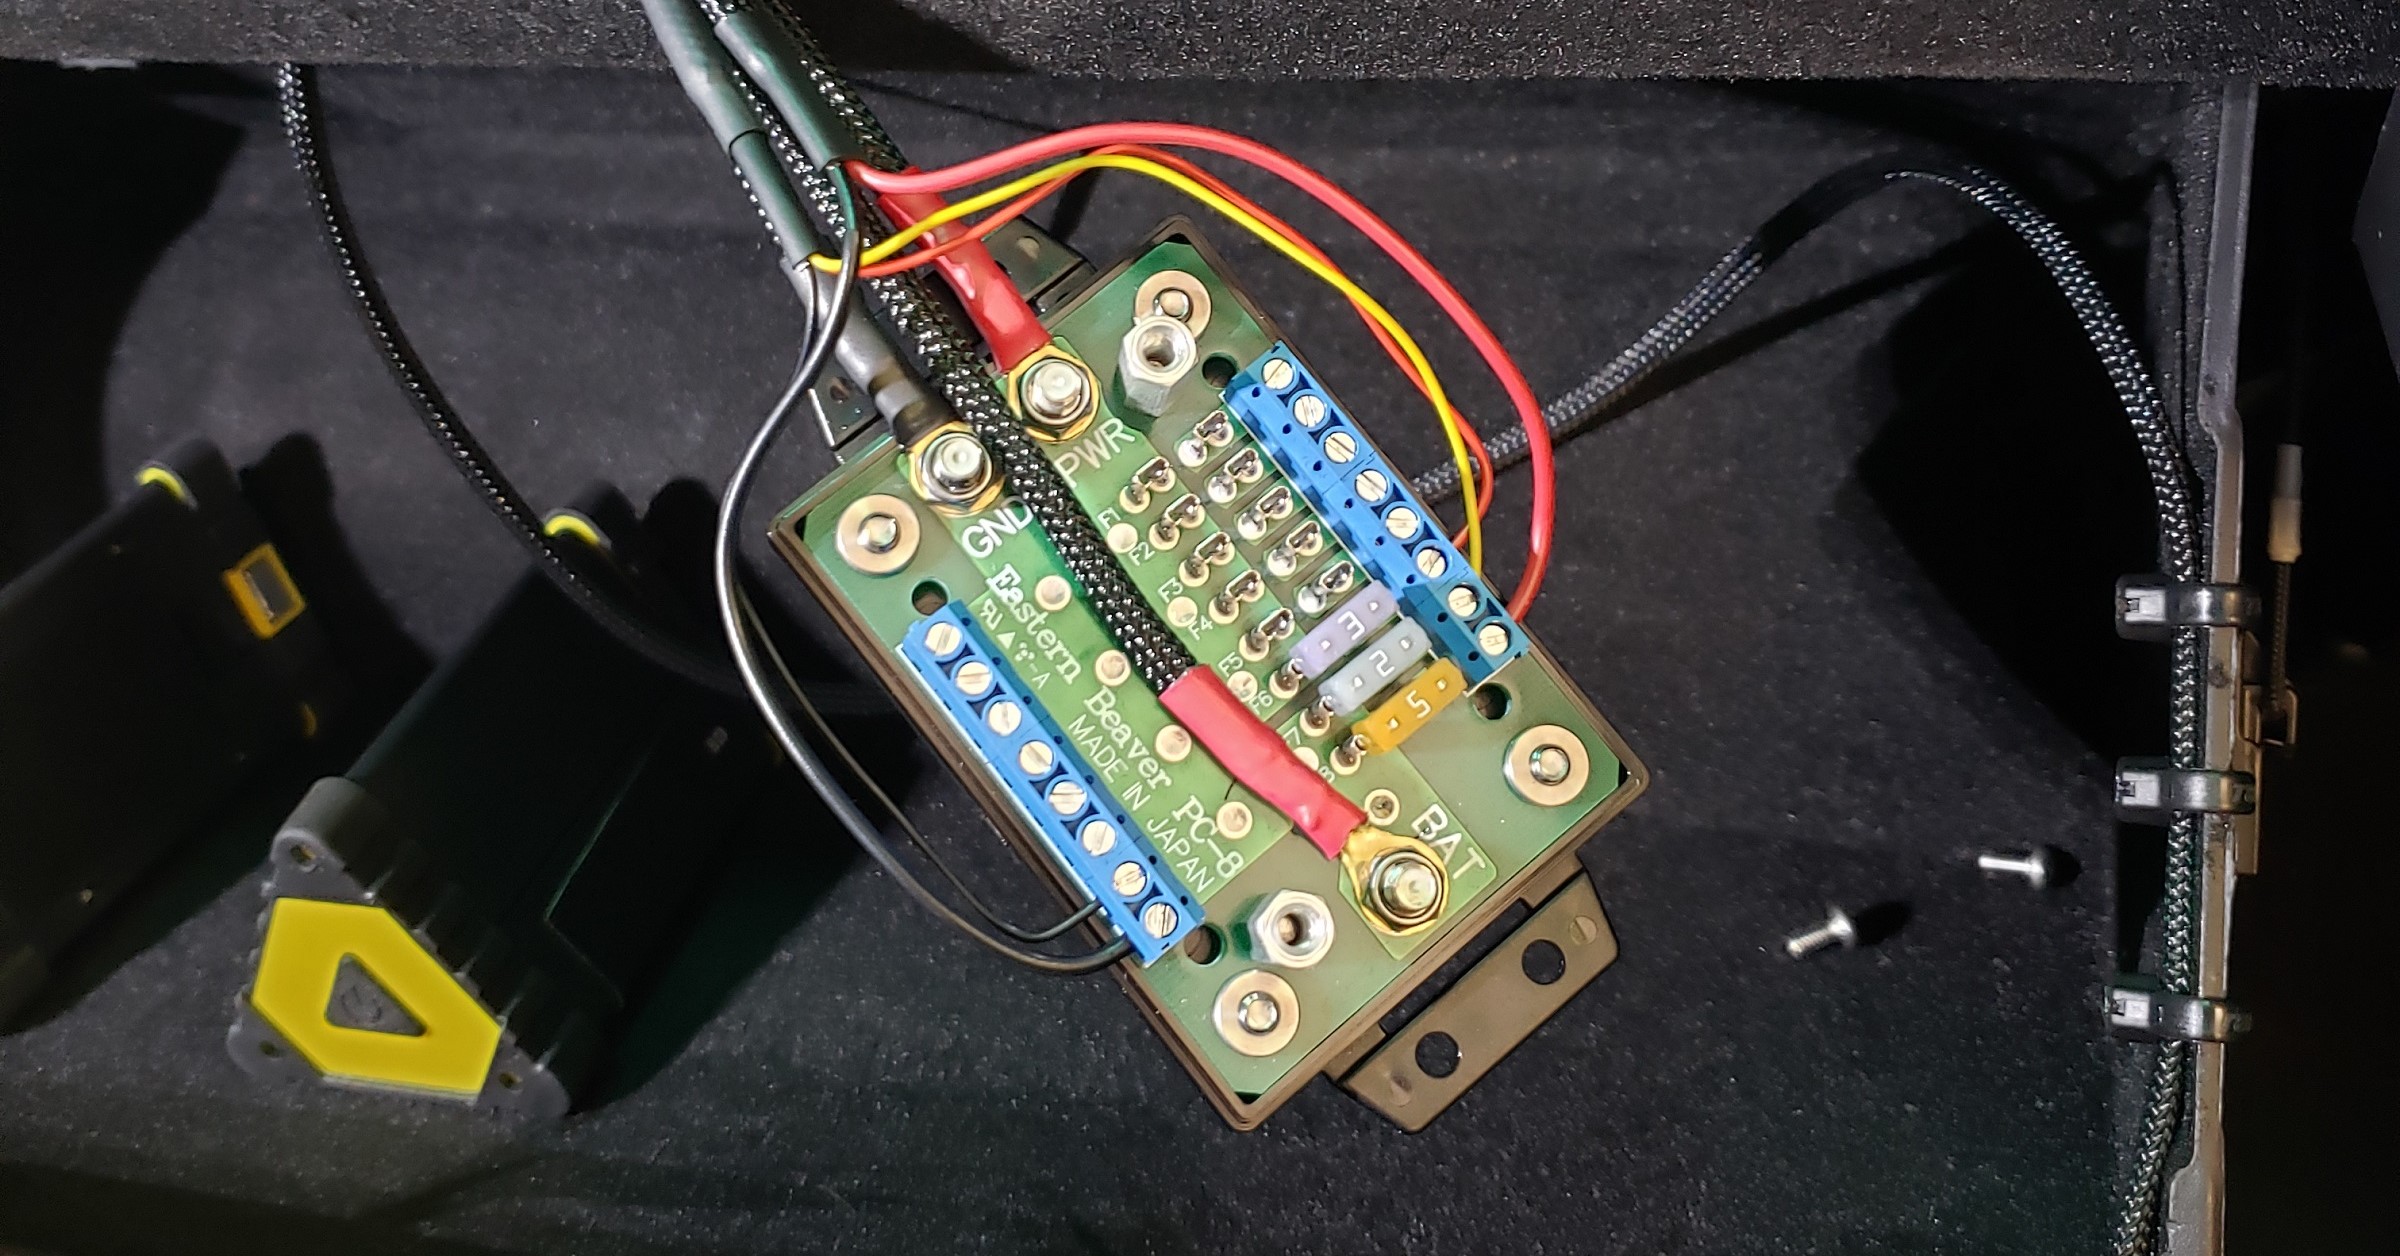
As I began looking for something that would work, I starting within the motorcycle community as many aftermarket parts there are compact in size. I ran across this little gem. The Eastern Beaver PC-8 Power Point. It’s got 8 fusible power taps, with 2 of them being ALWAYS ON accessory taps and the other 6 being KEY ON accessory taps
It’s pretty cool and places all the fuses you need into one central location. Since it’s mostly intended for motorcycles, it’s very small and rugged. It’s a high quality piece from an American entrepreneur who, apparently, lives in Japan. Not sure what the story is behind that, but I’m sure it’s an interesting one. Eastern Beaver has some pretty cool stuff, actually. Check them out.
Here are some quick shots of the final installation, before I dive into it…
Parts List
In addition to the main power distribution box, you also get the hardware pictured below. Most of it I didn’t use, but I like that it is a pretty thorough kit.
However, as this was going to be used in a different application, I needed a few extra parts:
- Item# FFH-L-W, WHITE Single Furukawa Sealed ATM 30A Fuseholder L(16-12 AWG), Qty: 1
- Item# FFH-L-B, BLACK Single Furukawa Sealed ATM 30A Fuseholder L(16-12 AWG), Qty: 1
- Item# PR40, 40A Mini Relay, Qty: 1
- Item# RS40, 40A Mini Socket, Qty: 1
I had some of my own wiring laying around from other projects. I stayed with a 14ga wire as I felt that would carry any potential current this small box would ever get to see. The following photo is what I wanted to emulate, but as this was in an untraditional application, I didn’t want to buy the “kit”, because I would’ve had to tear it part anyway. So I just bought what I needed to make my own harness.
Installation
For starters, let’s take a quick look at a simple diagram so we know what we need to try and accomplish here. As this is used mainly in motorcycles, the installation is a bit different in execution, but the concept is still the same.
It all starts with a good place to get power from the battery into the cabin
So keeping everything secured was a big deal as well. With all the wires inside this area, it is becoming a challenge to keep everything organized, so a few holes for zip-ties had to be drilled.
Grounding the box was relatively simple. Running the same gauge wire from the NEG terminal of the box alongside the 2 POS wires until it comes out by the door jamb area, the run it up to the “A”-pillar and ground it there.
Finding a switched power source, without having to tap into an existing wire actually proved to be pretty difficult. Within the Battery Junction Box (BJB), the fuse area encompassing F67-F72 and F89-F93 are the switched fuses, which energize when the key is on. All others are constant 12VDC sources. There was only one available slot, F71 was the only place open to put a fuse in.
At the time of installing this box, I hadn’t attempted to access the bottom of the BJB, so keeping the wires external to it, I had to get creative. Tapping one leg of the fuse toward switched 12VDC source, and bending the leg and soldering a wire to it, in order to bring the switched power source out of the box. I never liked this idea as it left me stranded if the fuse blew. I’d have to solder it again. I finally addressed this issue when upgrading the BJB to additional switched power sources later on in another write-up. Check that write up here.
Below you see the updated connection method. It is what is most current.
The new location for the 3A fuse being used for the ignition source for the Eastern Beaver box is now fuse position F46 and can be easily replaced by another fuse at anytime should the need arise. Please be sure to read that other write-up that goes in-depth into how I got this terminal strip placed.
Because I wanted this box to be easily accessible in order to add circuits in the future I wanted it to be removeable. After thinking about the problem, I decided to use a piece of flat bar stock steel that I powdercoated black and drilled holes to secure it with zip-ties to the felt-lined plastic glove box internals.
I then used a spare RokForm magnet I had laying around that is secured with heavy duty 3M adhesive tape. I initially tried Velcro, but it wasn’t secure enough, so I went with the steel and magnet option.
You can connect any number of accessories to this box and it’s rated for 40A, so it’s pretty versatile with what can be used.
Glove Box USB Point
One aspect of this that I wanted was an always-on USB power point for any device I’d like to charge, even while the car is off. Surprisingly, it’s getting more difficult to to find cars that have that, as most have some sort of power-saving feature and turn off all charging points at some point when the car is turned off. It’s for a good reason, but having some place to charge things up, while the car is off has it’s benefits.
I went with the Motopower motorcycle charging plug as it was small and compact, but also had mounting ears.
Additionally, I didn’t want to have USB cables running all over the place. I wanted a charging point in the glove box, so if I ever went somewhere, I could charge my phone and store it away so it’s not visible. It also would serve as a semi-permanent power point for my wifi hotspot. This would allow my dashcam to continuously upload content to the cloud, so I’ll always have it. Check out the write-up on the dashcam here.
Overall this makes for a great source of power within the cabin, within reason (amperage draw). It’s a great little device and definitely cleans up and centralizes the wiring.